In my continuing quest to repurpose some of my old knit sweaters, here is a Christmas pillow that I made yesterday out of an old Nordic sweater that needed a new life.
Before I commence to showing you my up-cycling process ~ please pardon the quality of the photos. My digital camera died Sunday night, and I made these pillows yesterday before running out and purchasing my new little camera, so the photos were taken on my phone. Now I have to learn the new menus and button symbols on the new camera...so hopefully I'll be up and running with it by Market :)
To make a recycled sweater pillow, you'll need an old sweater to cut up, a half yard of cotton fabric for the pillow back, and a pillow form (mine is 16 inches), and Fusible Fleece or Interfacing.
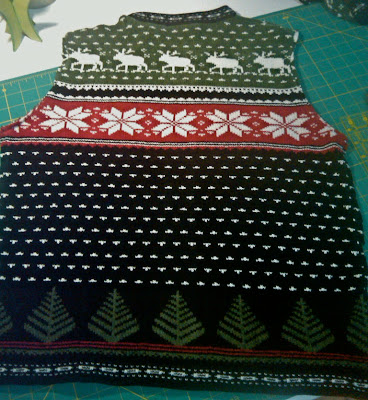
First I cut the sweater up the side seams and around the arm holes. This is the back of this particular sweater that I'm using for the pillow front.
Then, in order to stabilize the sweater, I fused a 16 1/2 inch square of fusible fleece to the back side of my sweater panel, placing it in the area that I want to become the pillow front. Other types of interfacing could be used for the same purpose, I just like the body and stability that the fusible fleece adds to the pillow.
Now, using my 16 1/2 inch square up ruler, I cut out around the fusible fleece square to give me my sweater pillow front. (The pillows can be any size that you want, or whatever works for your sweater ~ I chose 16 1/2" because I have a 16 inch pillow form).
To make the overlapping pillow back (so that a pillow form is removable), trim the half yard of cotton fabric to 17 inches by the width of the fabric. Then cut the fabric in half to make two pieces that measure 17 x 22". Fold the pieces in half, wrong sides together to make two pieces that are 11 x 17". Lay them out, using the grid on a cutting mat, so that the folds overlap each other in the center by 5" and the outer edges fit around a 17" square on the grid. Then lay the sweater square right side down, centered over the pillow back pieces and pin, then sew all the way around the outer edges using a generous quarter inch seam allowance (A walking foot is helpful for sewing through the layers). Clip the seam allowances and corners then turn the pillow right side out, and insert a pillowform.
For another alternative, a plain sweater square (leftover from the sweater that I cut up on Sunday) can also be embellished with applique. On this piece I used some wool shapes that I cut with my Accuquilt Go Fall Medley Die #55041. I then machine blanket stitched around the shapes (the fusible fleece has a nice affect here of making the appliqued shapes have some dimension). Border the embellished sweater square with some cotton strips, and back like above for another up-cycled sweater pillow.
All three are available in my Etsy store, or do a little archeology in your sweater drawers and make one for yourself...I'd love to see pictures of the ones you make!
Enjoy the day!
~ Dawn


4 comments:
Awesome !! thanks for the tutorial :)
I have seen mention of sweater pillows several places over the last couple of years but never have seen a tut - GREAT idea using the fusible fleece. Many thanks for taking the time to explain your methods - I truly appreciate this.
Well ... that's just too cute!
What a great idea and looks wonderful! Thanks for the instructions. Can't wait to try it out.
Post a Comment